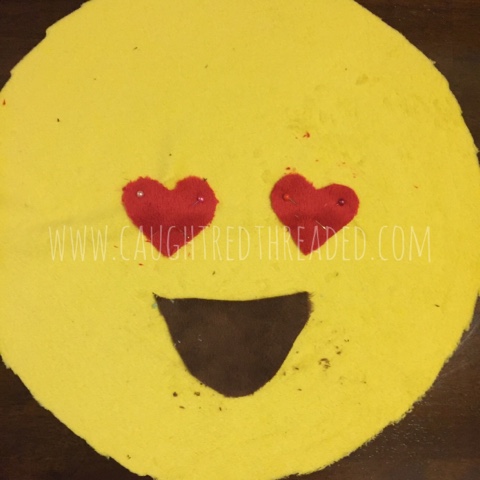
Fast forward to this week... This same emoji-pillow-begging-daughter came up with a great idea. She wants to make her own emoji pillow. She told me all about what it should look like, and even presented a drawing.
Now this is an idea I am on board with 100%! I love that she enjoys crafting, and that she has enough knowledge to know how to draw out a design, choose materials, and then create it.
To make this emoji pillow, you will need the following materials:
Sewing machine
Thread
1/2 Yard Yellow Fabric
Scraps of Red, Blue, White, and Black Fabrics
Fiberfill
To begin, you will need a circle template. We chose to use a dinner plate for ours.
It's easiest to fold your yellow fabric in half, then trace and cut both pieces together. This ensures they are identical to one another. We left a 1/2" seam allowance around the plate. Note: it's best to pin your fabric pieces together before you begin cutting. This way, if something is amiss when using your scissors, you will be able to continue where you left off with little trouble.
You will cut out your eyes and mouth. As you can see, my daughter wanted to make the "love" emoji and cut out hearts for the eyes.
We originally cut our a blue tear drop, but I had to override the idea. It made this emoji pillow look like someone who had a "kill" teardrop tattoo. This was not exactly the look we were going for.
Next, you will want to pin your eyes and lips to the front side of your pillow. You can either hand or machine stitch these on. We chose to machine sew for both time savings, and increased durability.
Place your two yellow fabric circles right sides together. Machine stitch around, leaving an opening 2"-3" across to allow for turning right side out and stuffing.
When our right sides were pinned together, this image game to mind.
Prior to stuffing, you may want to run a hot iron over your pillow to decrease the wrinkles if using cotton fabric. It's easier to do now, as opposed to once it's a pillow.
We were using minky fabric. It's best to not iron minky. I'm going to take a moment to talk about this fabric. It is very soft. From a tactile perspective, you really can't go wrong. Minky is also finicky, and messy when sewing with it. If you choose minky for your pillow, or any project, be sure to have a lint roller on hand to clean up your project and yourself when it's complete. In addition, you will want to use a test piece before beginning as the tension and stitch length on your machine are likely to need adjustments. It seems that every time I make something with minky, I insist it's the last time yet here I am.
Back to our project... Locate your opening. Begin to place small pinches of fiberfill stuffing into your pillow. If you place larger chunks of stuffing inside, it's likely to appear clumpy when you are finished. The finer the fill, the more ideal your end result will be.
You're almost done! All that's left is to close your pillow. You can use a hidden stitch sewn by hand, or take a moment to zip across the opening with your sewing machine. My hands don't appreciate holding a small needle, so the sewing machine was perfect for us to complete this incredible, thought up by a 9 year old, project.
We wish you happy crafting! If you make this pillow, or one like it, please share a photo in the comments below.


Comments
Post a Comment